Preparatory steps
Preparation Steps
ℹ️ Information: In this section, you’ll set up the necessary AWS resources for the CloudWatch workshop using AWS CloudFormation. This automated deployment will create EC2 instances with pre-configured applications that generate metrics and logs for our monitoring exercises.
-
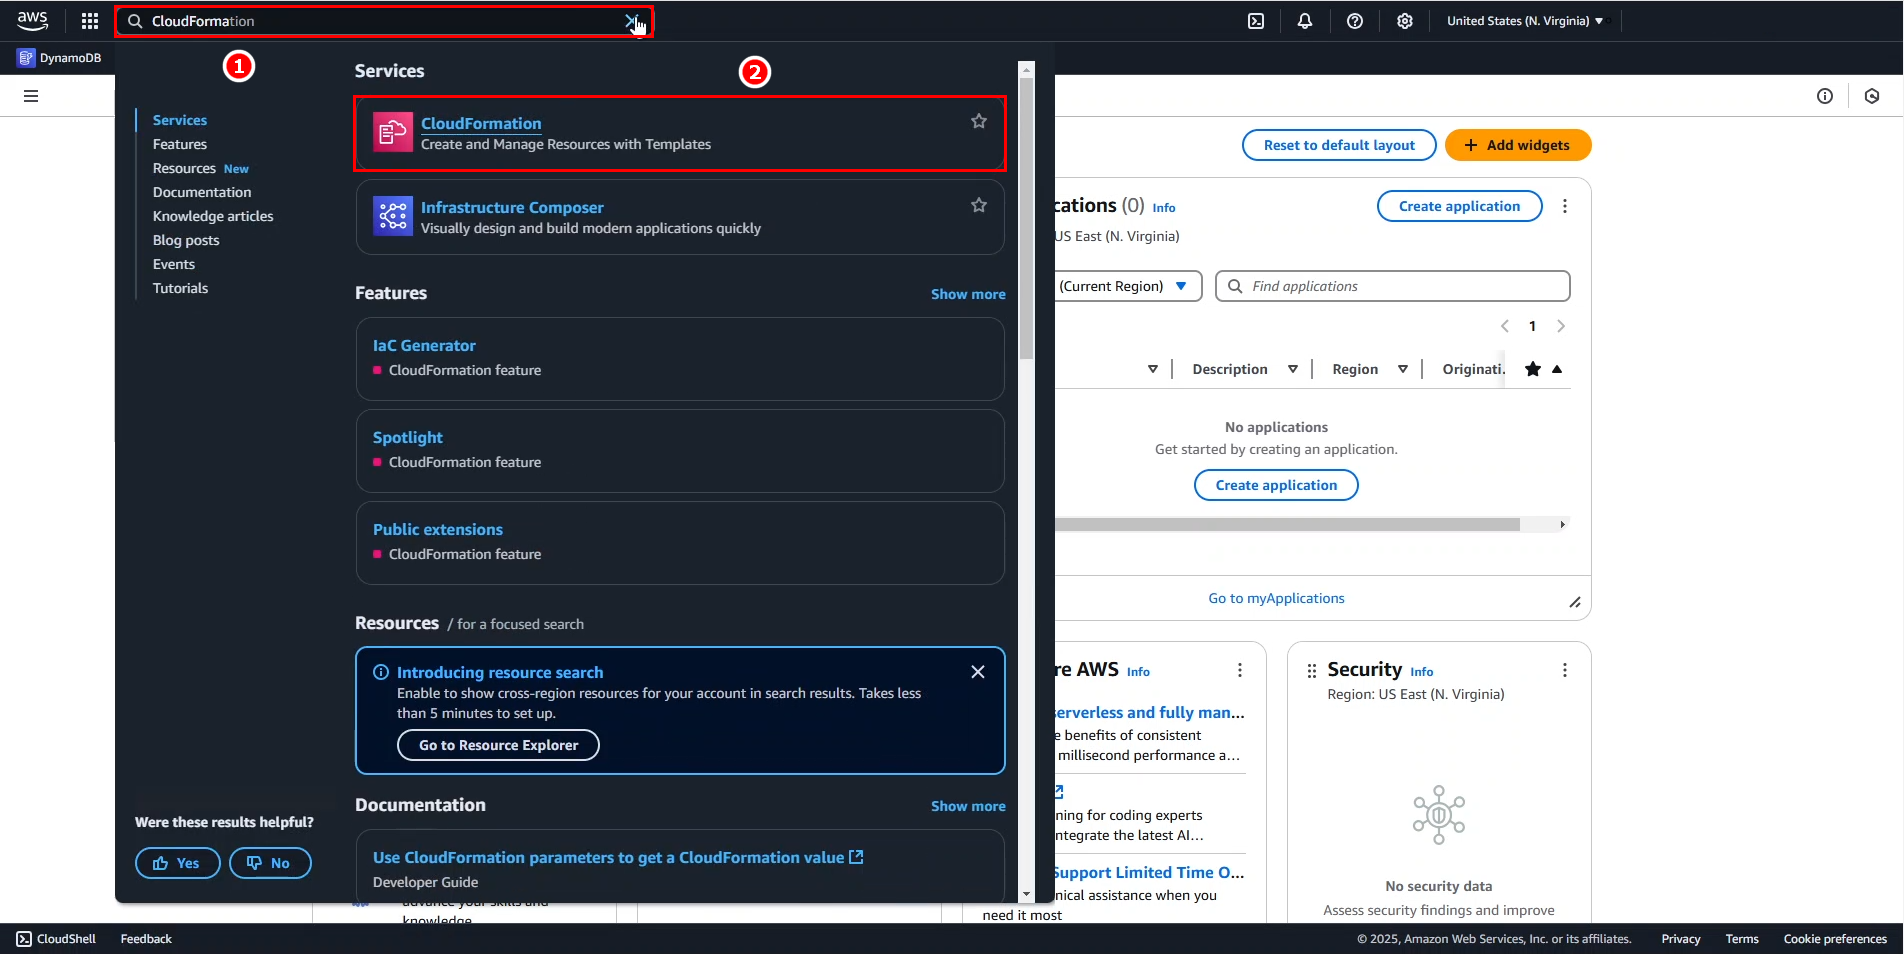
Access the AWS Management Console:
- In the search bar, type CloudFormation.
- Select CloudFormation from the services list.
-
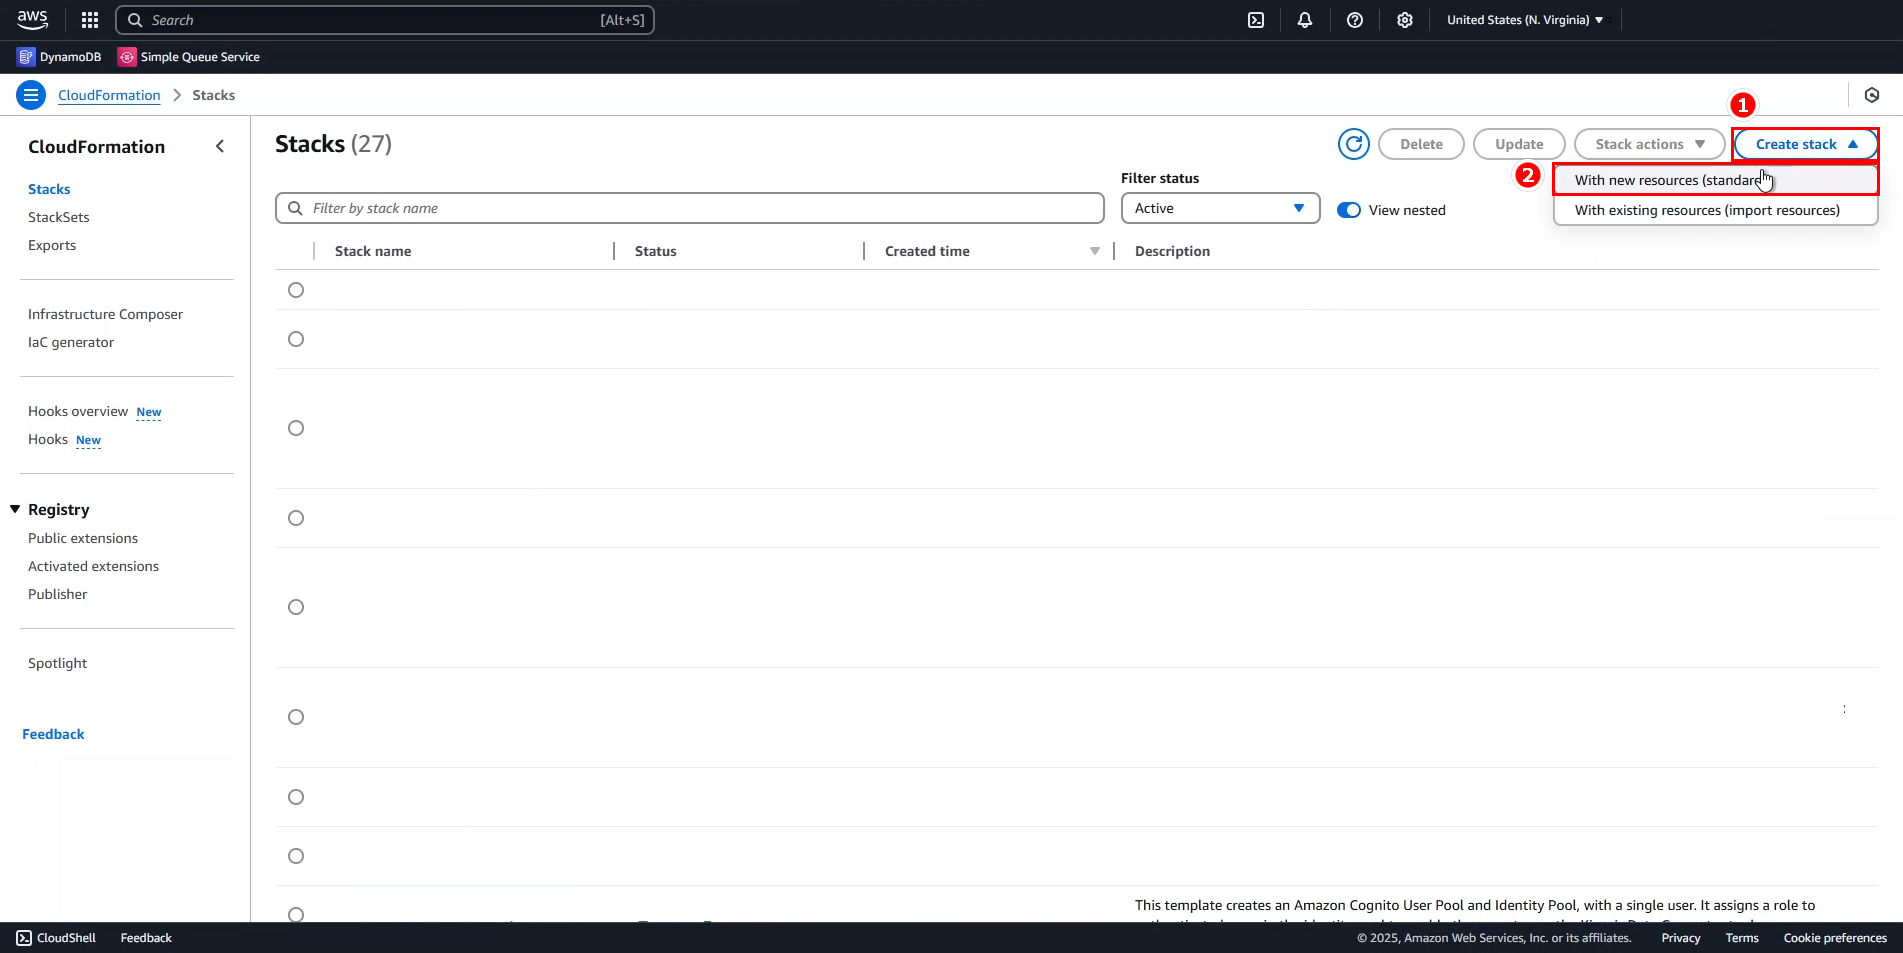
In the CloudFormation console:
- Click Create stack.
- Select With new resources (standard) from the dropdown.
-
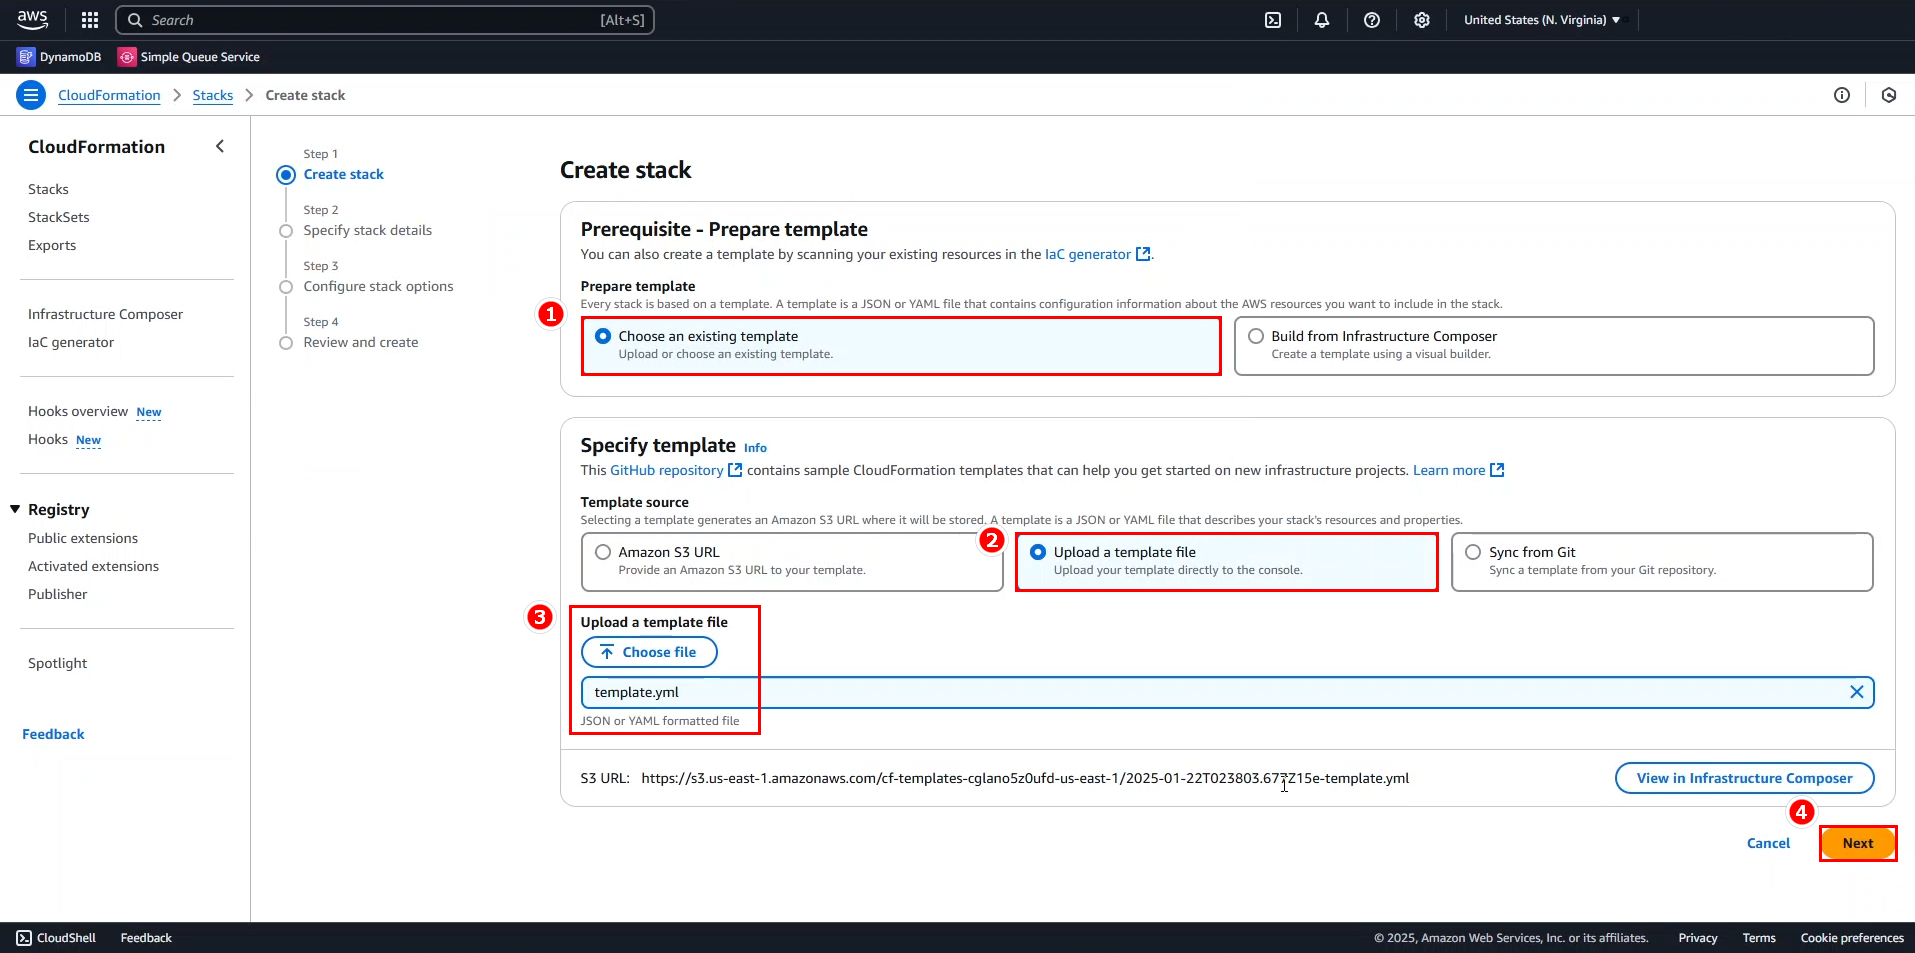
For the stack template:
- Download the CloudFormation template.
- Under Prerequisite - Prepare template, select Choose an existing template.
- Choose Upload a template file.
- Click Choose file and select the template you just downloaded.
- Click Next to proceed.
-
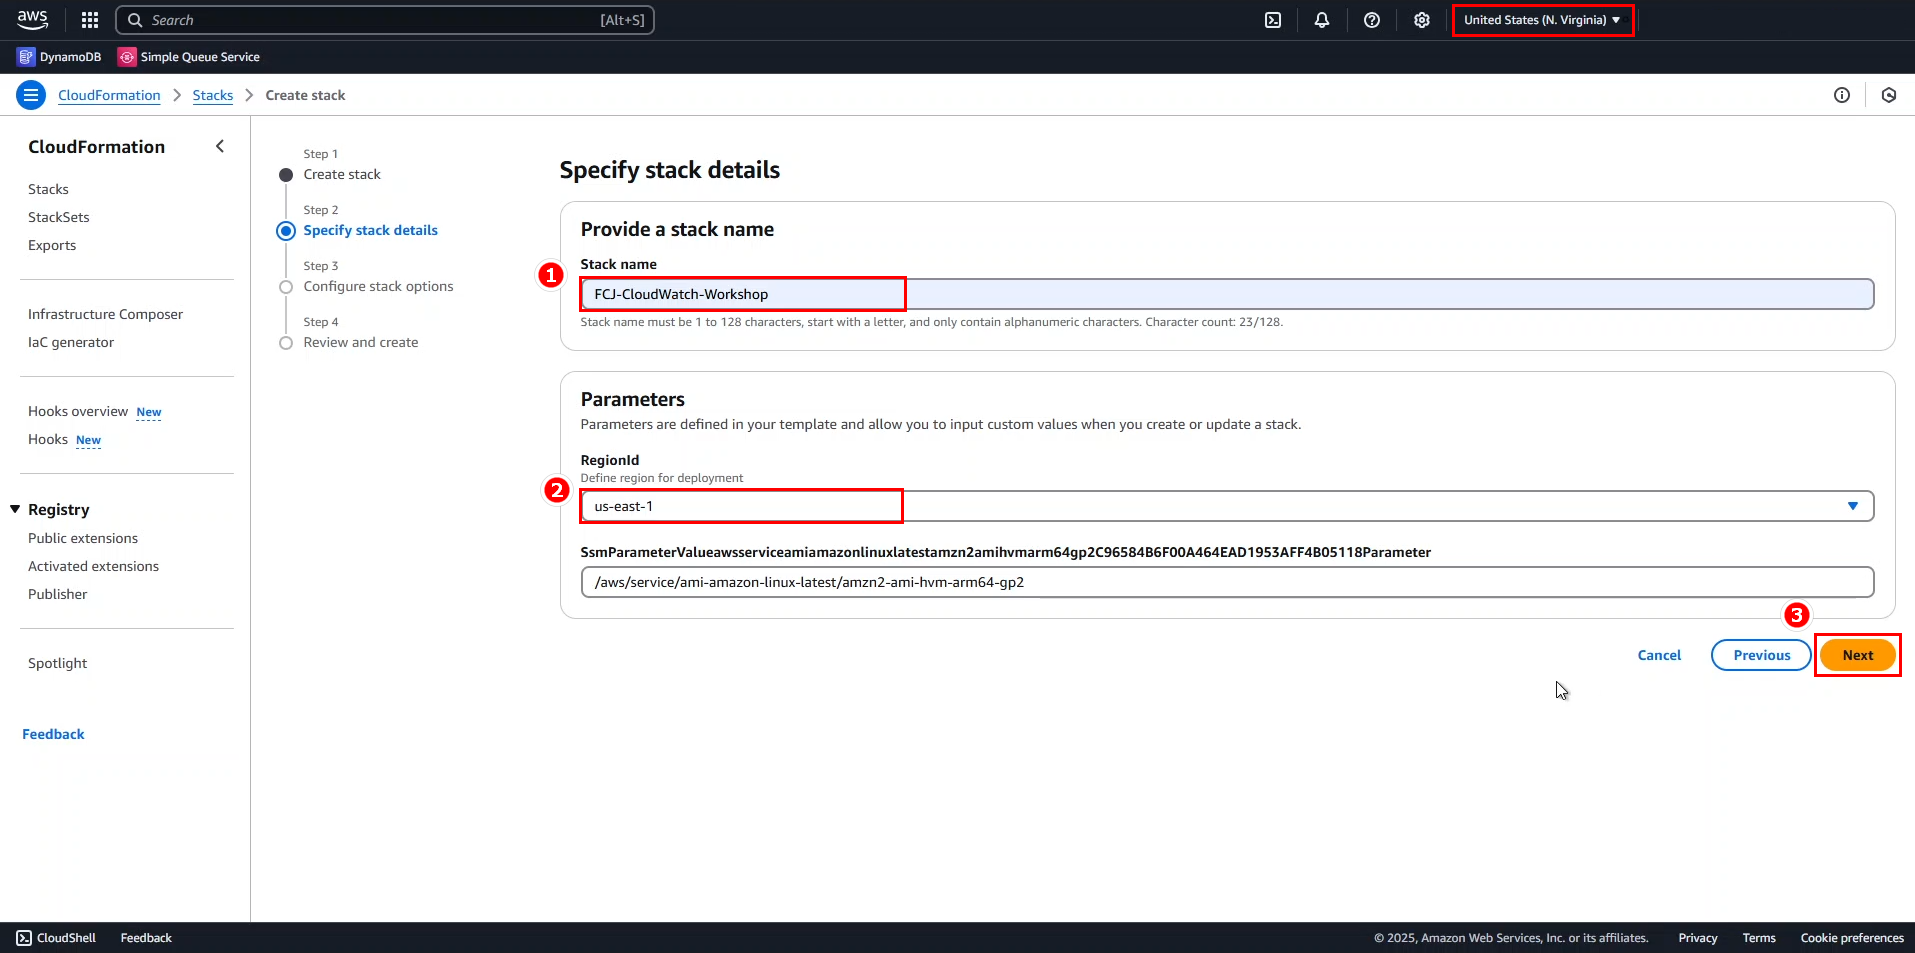
Configure stack details:
- Stack name: Enter
FCJ-CloudWatch-Workshop(or a preferred name that’s easily identifiable). - RegionId: Select the AWS Region where you’re conducting this lab (for this example, we’re using us-east-1 - N. Virginia).
- Keep all other parameters at their default values.
- Click Next.
- Stack name: Enter
💡 Pro Tip: Using a consistent naming convention for your CloudFormation stacks makes resource management easier, especially when working across multiple projects or environments.
-
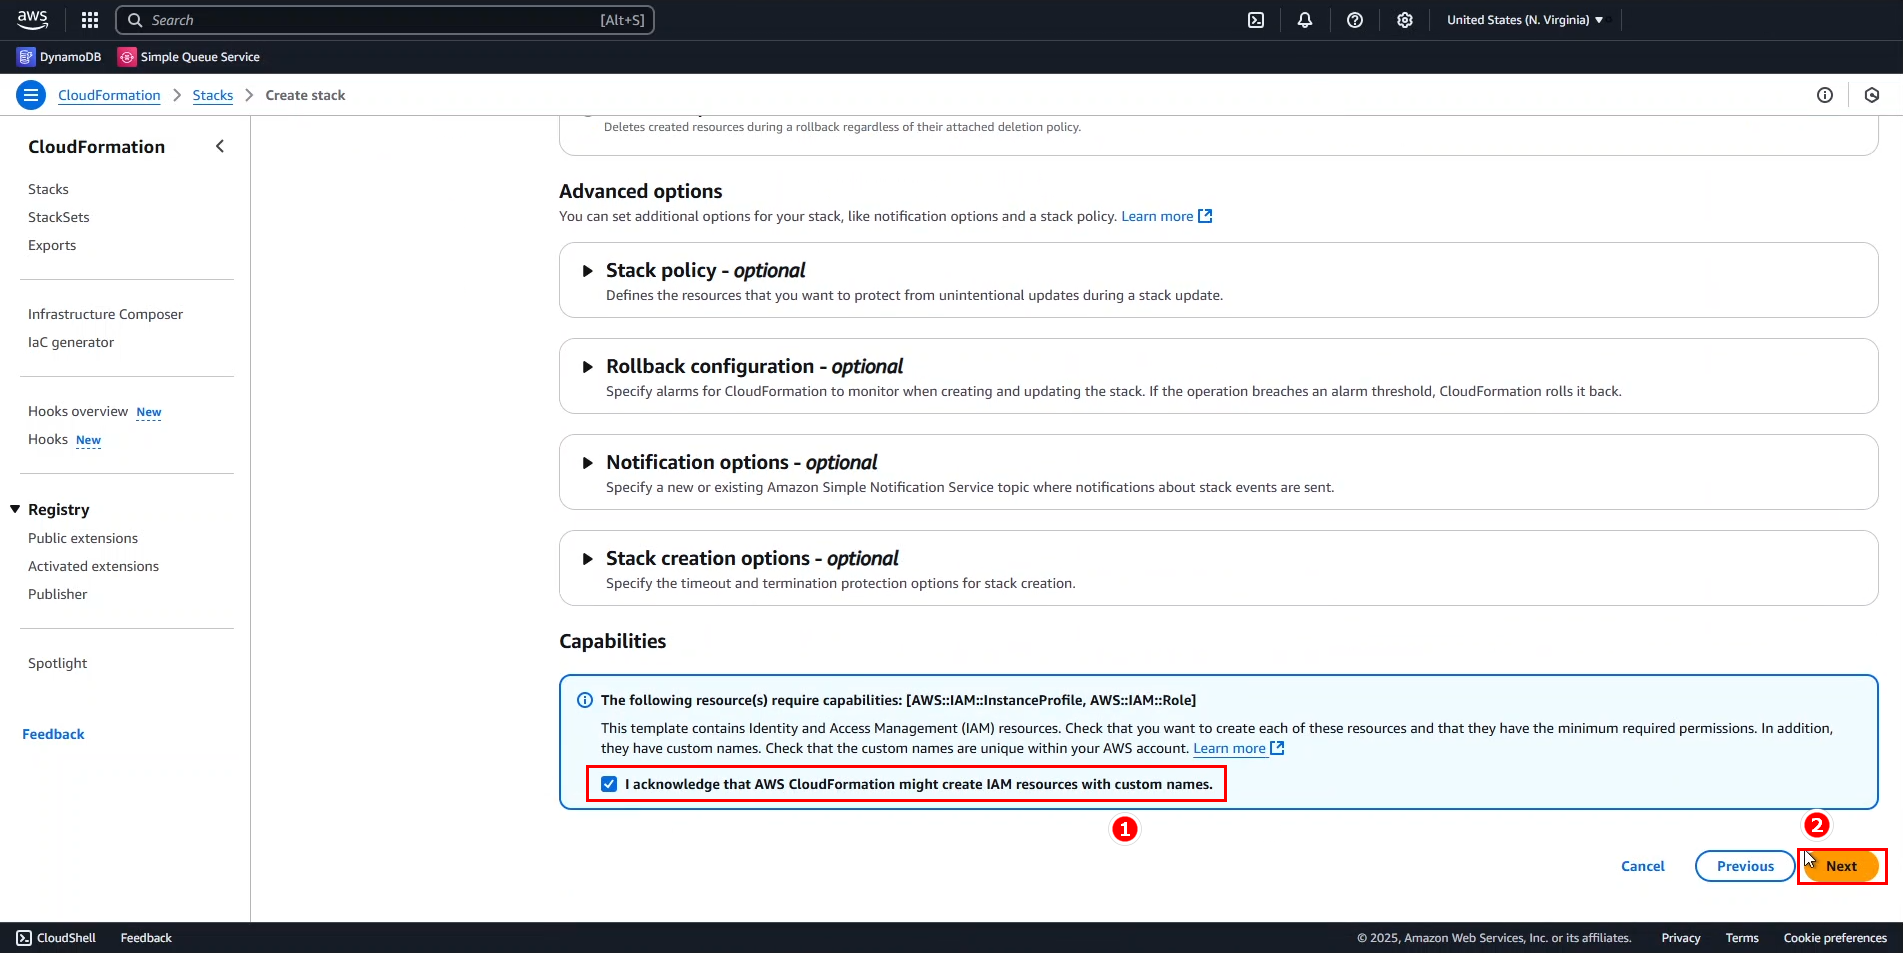
Configure stack options:
- No additional configuration is required on this page.
- Scroll to the bottom and check the acknowledgment box: I acknowledge that AWS CloudFormation might create IAM resources with custom names.
- Click Next.
🔒 Security Note: The CloudFormation template creates IAM roles with least-privilege permissions necessary for this workshop. In production environments, always review IAM permissions carefully to ensure they follow security best practices.
-
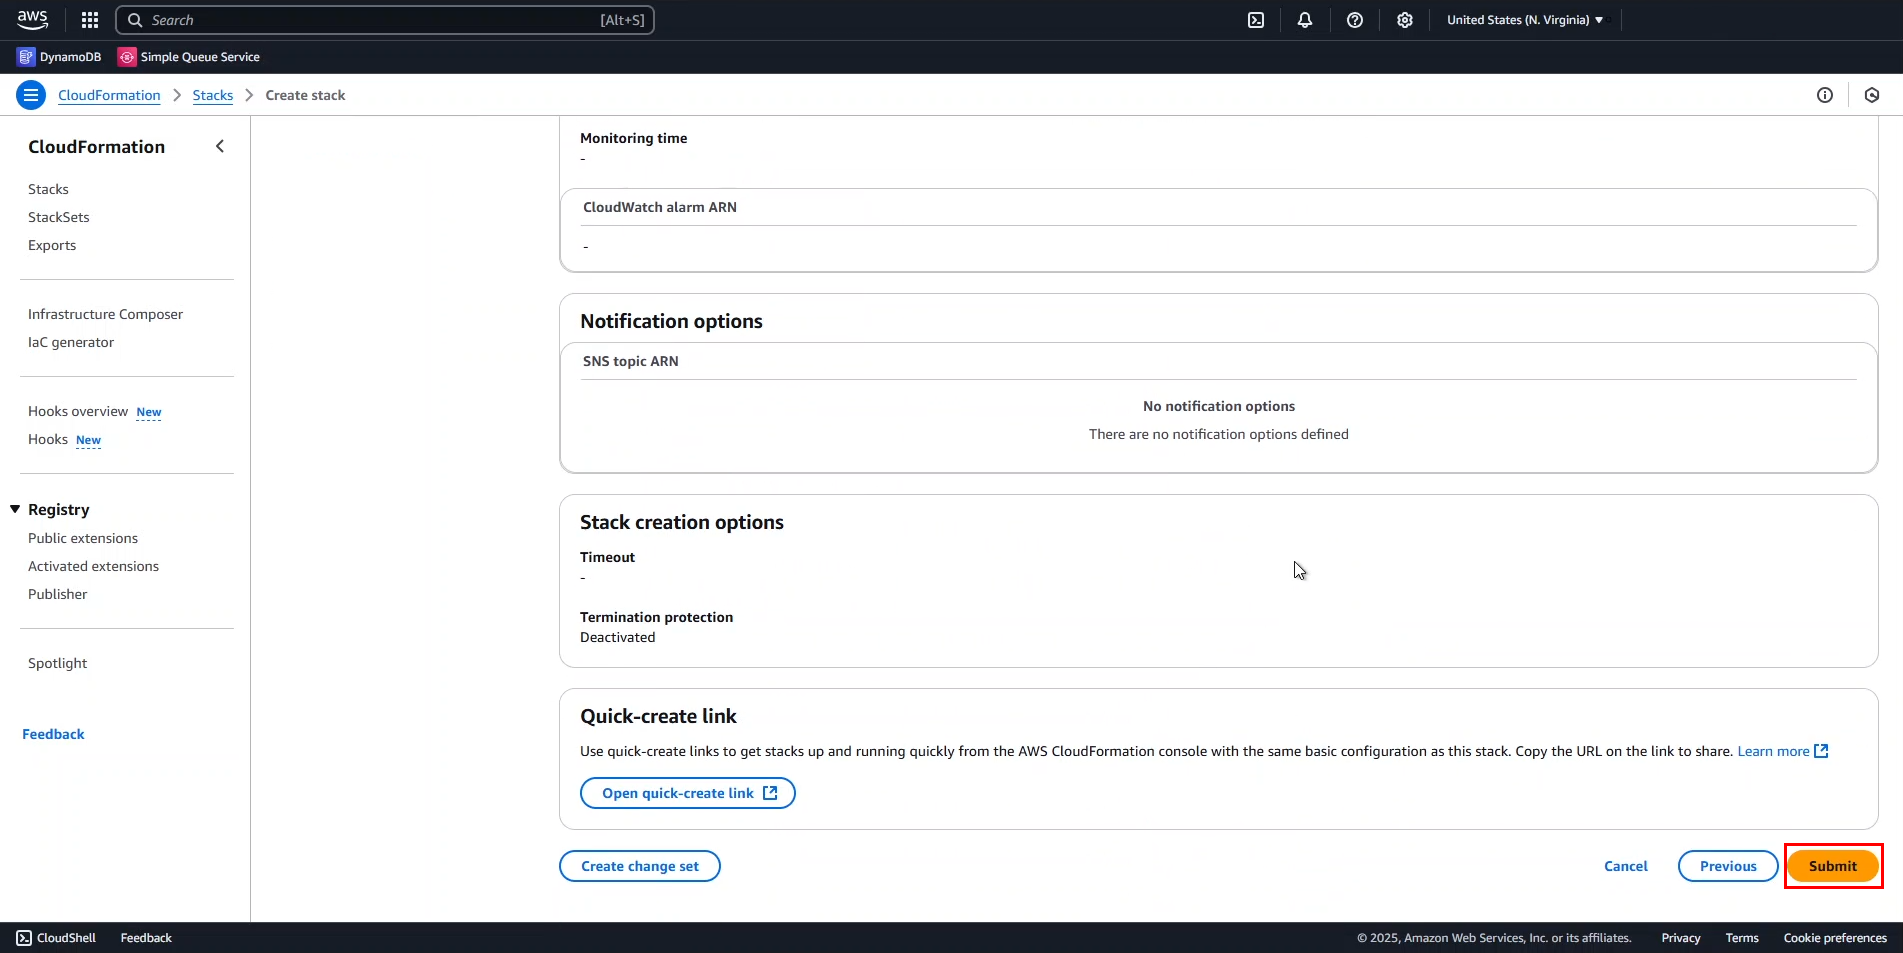
Review and create:
- Verify all configuration details.
- Scroll to the bottom and click Submit to initiate stack creation.
-
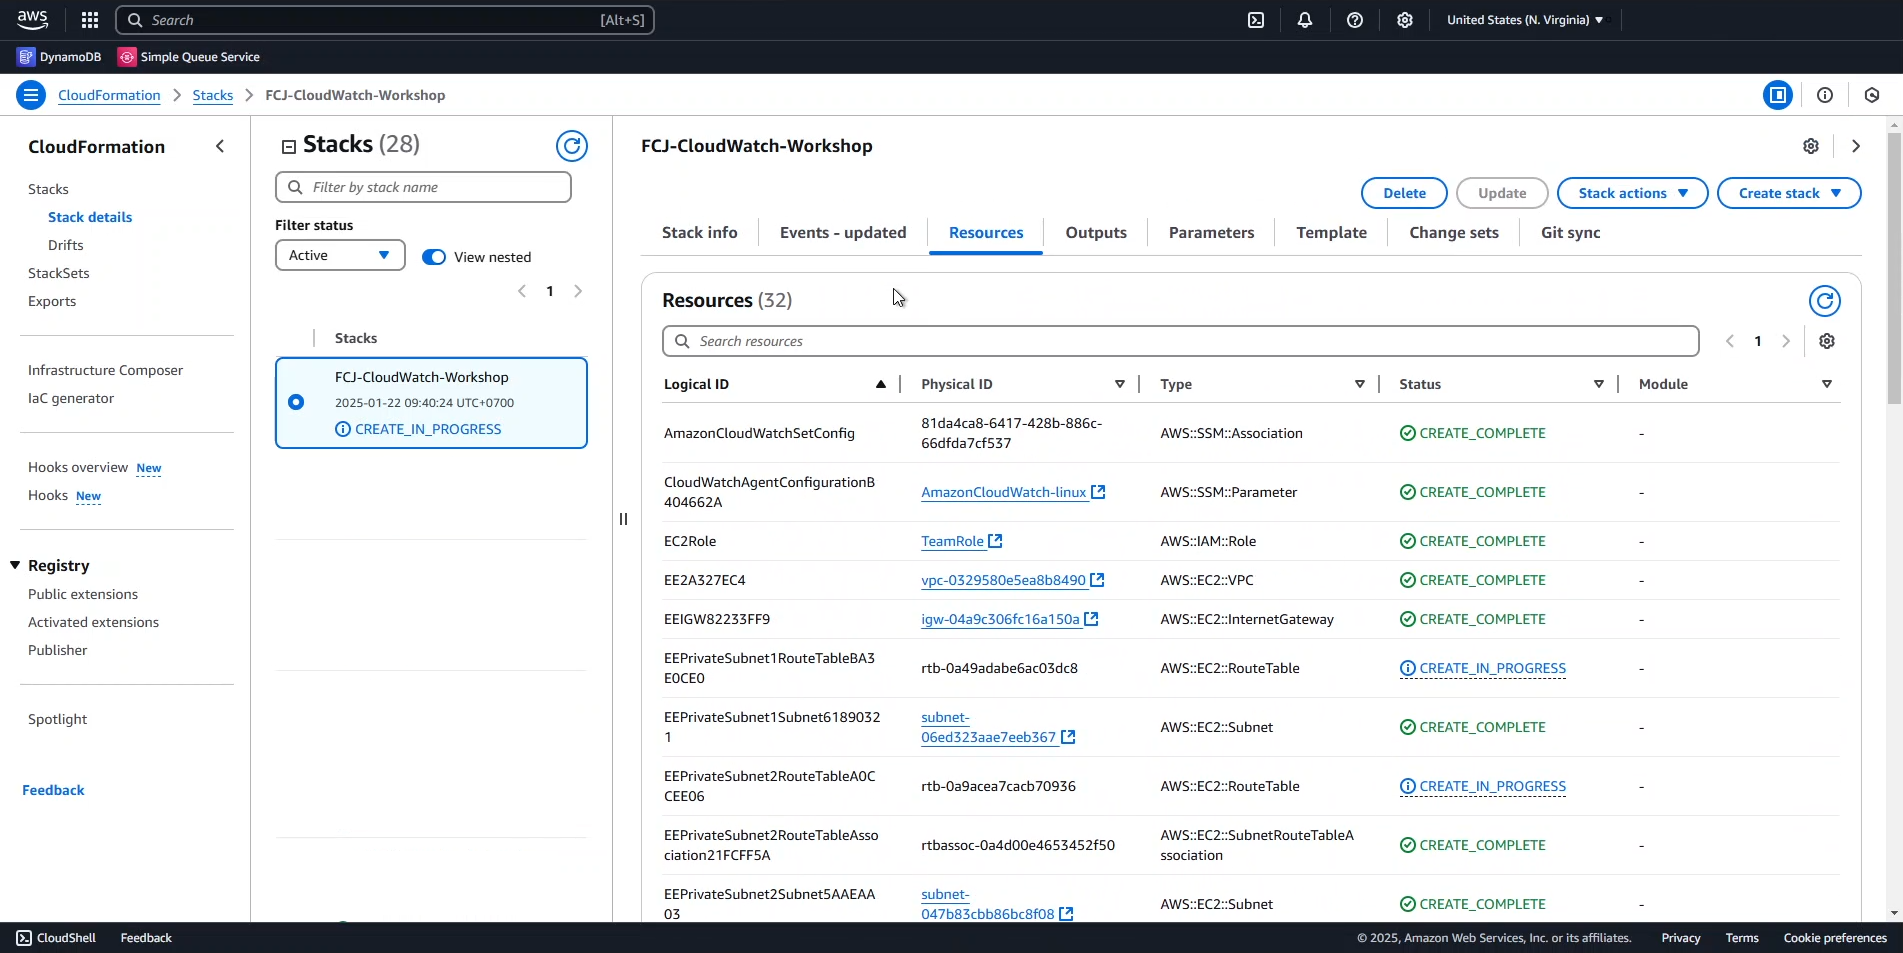
Monitor stack creation:
- The stack creation process will begin immediately.
- Wait approximately 5 minutes for the deployment to complete.
- You can monitor the progress in the CloudFormation console.
When the deployment completes successfully, you’ll see the stack status change to CREATE_COMPLETE:
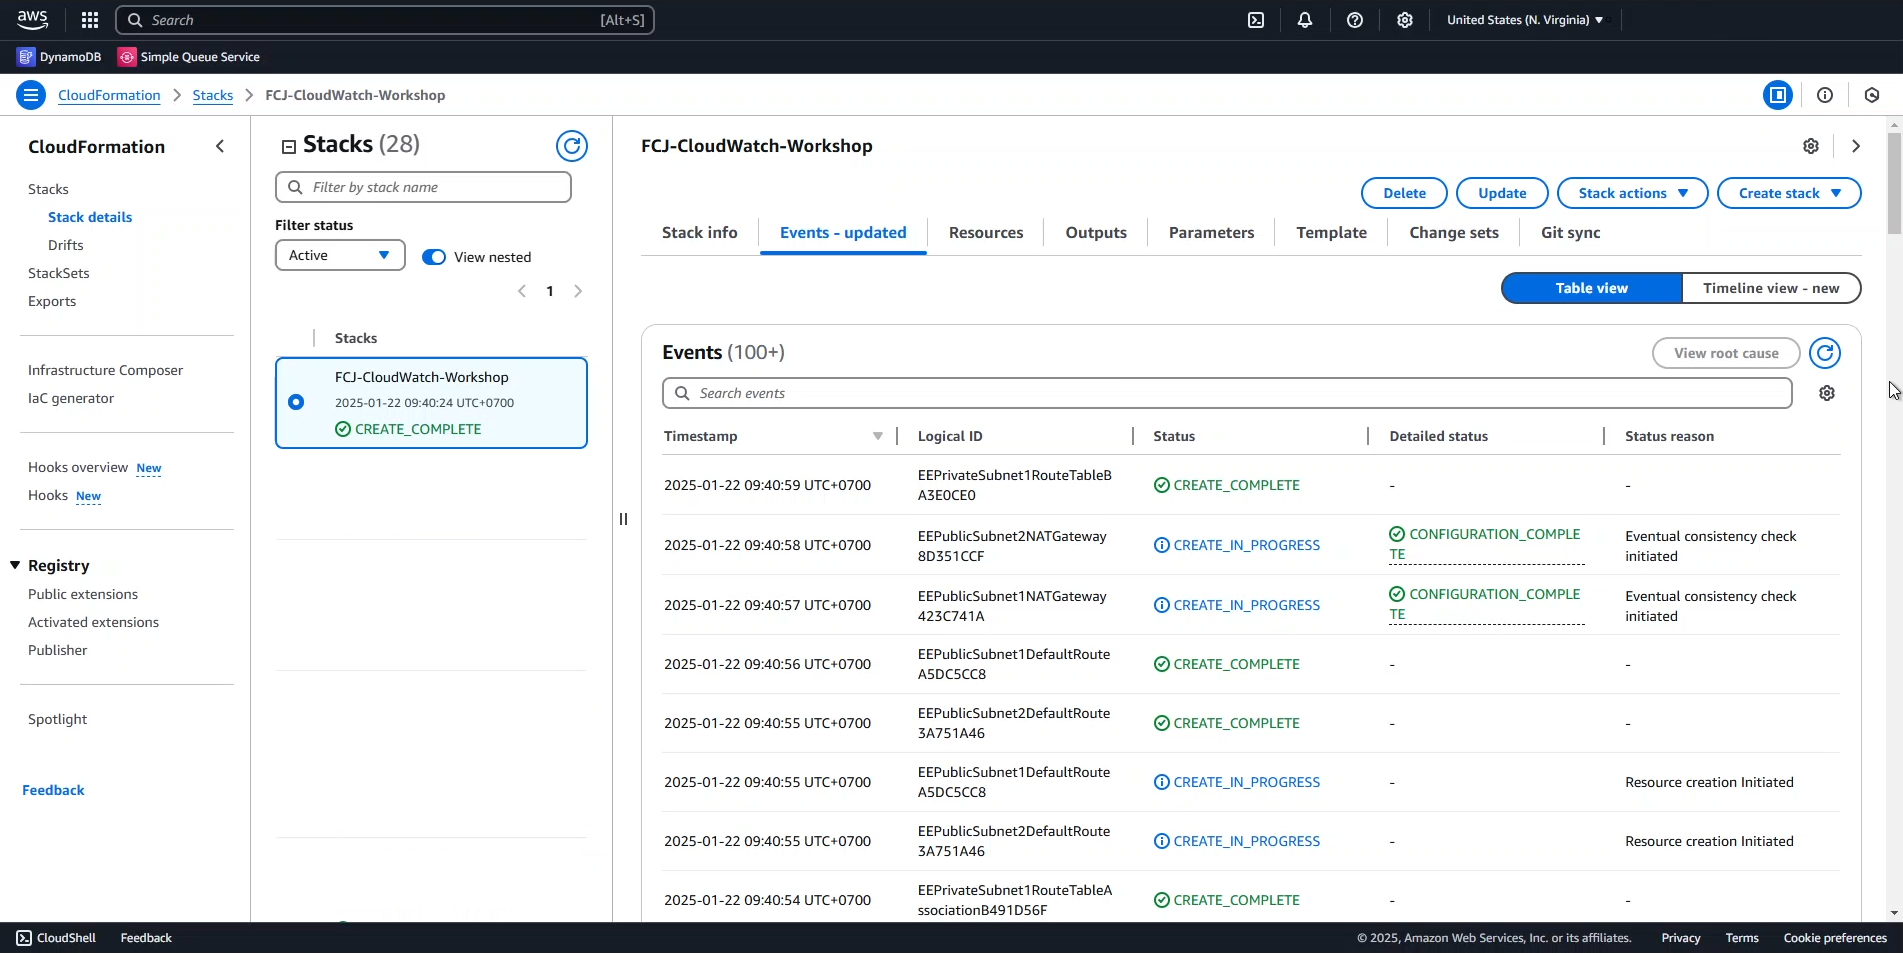
ℹ️ Information: The CloudFormation stack has deployed EC2 instances running sample applications that will generate metrics and logs for our CloudWatch exercises. These resources are pre-configured to demonstrate various CloudWatch capabilities throughout this workshop.
The preparation step is now complete. In the following sections, we’ll explore CloudWatch’s monitoring and observability features using the resources we’ve just deployed.